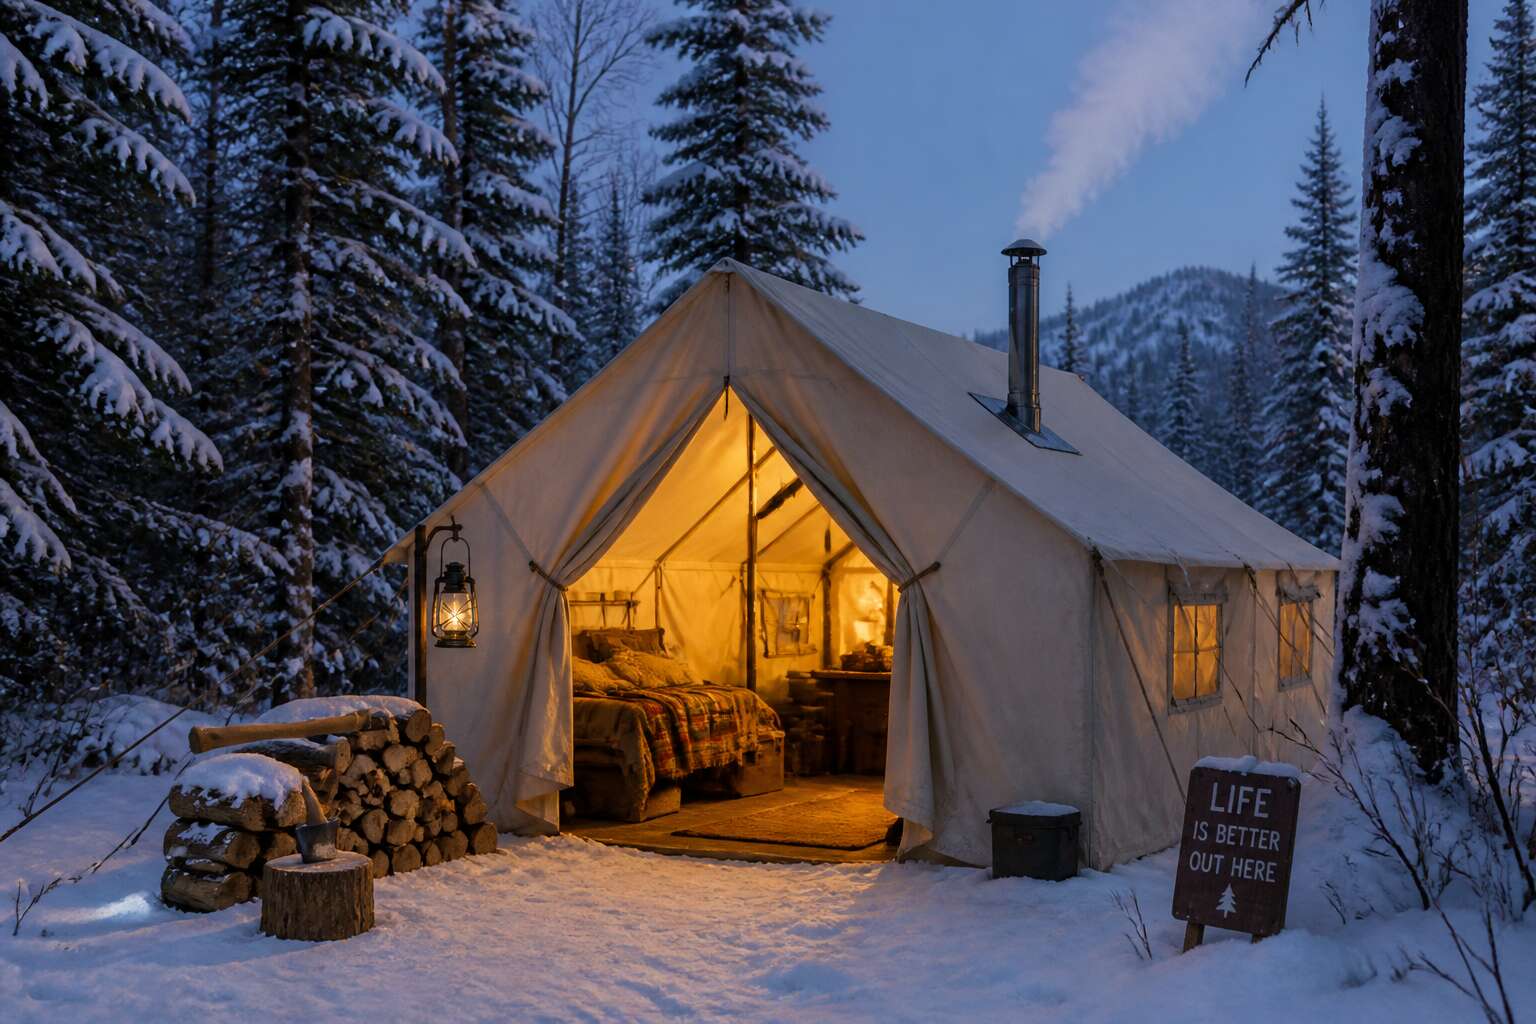
Understanding the Appeal of Hot Tenting
Defining a Stove Jack and Its Core Purpose
Waking up without frost on your sleeping bag changes how you see cold weather camping. A wood stove burning safely inside the tent makes that possible. For South Africans heading into the Drakensberg or the Karoo, where nights get bitter, this warmth extends the season and improves a good night’s rest.
The appeal comes down to a few simple outcomes:
- Wet gear dries overnight
- Late season trips become feasible
- Evenings get longer and more social
The stove jack is the critical component. It is the fireproof opening that allows the stovepipe to exit through the fabric. Its core purpose is directing smoke outside while keeping heat in. Camping tents with stove jack come with reinforced webbing and heat shields built into the structure. Camping tents with stove jack keep the pipe secure and the fire contained. It is not glamorous, but without it, hot tenting would be dangerous.
A Brief Evolution of the Wood Stove Tent
Understanding the Appeal of Hot Tenting
There is a particular silence in the Karoo at midnight. It is the silence of a world that has stopped breathing. Inside a hot tent, that silence presses against the canvas while the stove ticks and murmurs. This is the appeal. I have sat awake in that warmth, watching frost form on the grass just beyond the door. Fire has been our constant companion, and to sleep beside it is to reclaim something ancient.
A Brief Evolution of the Wood Stove Tent
The evolution began with canvas and cast iron. Explorers and military expeditions carried heavy stoves into frozen landscapes. Those early designs informed the modern camping tents with stove jack, which now use lightweight fabrics and precision-engineered fireproof openings. The principle remains unchanged: contain the flame, direct the smoke, and keep the night at bay.
Top Scenarios for Using a Stove-Equipped Shelter
In the Cederberg, winter nights drop below freezing. Camping tents with stove jack keep that cold away. The appeal is primal. You sit inside warmth while the outside world hardens. I have never found that contrast anywhere else.
Certain situations demand this setup more than others:
- Winter mornings on the Drakensberg escarpment, where frost makes ordinary tents miserable.
- Stormy Cape coast camps, where drying boots and jackets becomes a daily fight.
- Long Karoo hunting trips that need a warm base before sunrise.
A stove-equipped shelter gives you that base. It turns a harsh evening into a controlled environment. For anyone who camps in southern winters, that control is the entire point.
Key Limitations to Consider Before Buying
Hot tenting changes the relationship between camper and weather. In the southern Cape, winter fronts arrive without mercy. A stove inside a canvas shelter turns a bitter evening into a livable one. I have sat through freezing nights with the fire ticking beside me. The difference is not comfort. It is control.
Camping tents with stove jack are not for every trip. They add mass, require dry fuel, and need supervision after dark. Wet wood creates smoke, not heat. Poor ventilation leads to condensation dripping from the roof. These practical limits shape where this gear makes sense:
- Vehicle-based camps suit the extra weight better than backpacking routes.
- Canvas walls demand proper drying before packing, or mildew takes hold.
- Stove clearance and ember guards are non-negotiable for safe use.
Knowing these constraints clarifies what camping tents with stove jack actually deliver. The appeal is honest, but the limitations are real.
Canvas vs. Synthetic Fabrics for Stove Compatibility
Hot tenting changes how you face winter. A stove hissing inside a shelter takes the edge off the dark. The appeal is not nostalgia. It is the moment the fire catches and the cold steps back. That moment depends on fabric. Canvas handles stray sparks without a flinch. Synthetic materials melt into brittle holes. This is why camping tents with stove jack are rarely built from thin air.
Canvas breathes. Moisture from your breath and the fire moves through the weave instead of dripping on your sleeping bag. Synthetics dry fast but turn the same vapour into a rain shower. I have slept through a drizzle inside a nylon tent. Never again. For a proper stove setup, the fabric must survive both heat and condensation. Canvas does. It also holds warmth longer once the fire dies. Camping tents with stove jack built from canvas deliver that performance.
Selecting the Right Shelter for Your Heating Needs
Essential Material Qualities for Heat Resistance
Choosing the wrong shelter for a wood stove can turn a cosy evening into a dangerous one. I have learned that selecting a shelter for heating demands more than checking the price tag. The fabric must handle radiant heat without degrading, and the stitching must survive years of thermal stress!
For camping tents with stove jack, the essential material qualities revolve around ignition resistance and thermal endurance. The fabric’s weave density determines how well it resists heat penetration. A tight weave slows radiant heat, while a loose weave creates weak points. Stitching must be heat resistant to prevent seam failure.
- A fabric weight above 300 GSM provides robust insulation.
- A stove jack with a fire-resistant silicone grommet prevents heat damage.
- A flame retardant treatment on the floor adds a layer of safety.
How to Match Tent Size with Stove BTU Output
The Karoo night swallows heat with a hunger that surprises seasoned campers. I have watched a small stove struggle against a cavernous tent, its flames licking at the cold. A shelter too large for your stove’s BTU output leaves you shivering; one too small drives you out gasping.
For camping tents with stove jack, volume and heat decide your night. A 4,000 BTU stove suits a compact shelter of 10 square metres. A 10,000 BTU unit demands more room to breathe, or the fabric will suffer.
- Measure the tent’s floor area and height for cubic volume.
- Match the stove’s rated BTU output to that volume, not to sleeping bag count.
- Account for wind exposure and ambient temperature in the Drakensberg or the Cederberg.
I err on the side of a smaller tent. With camping tents with stove jack, the shelter must match the stove’s output, not the other way around.
The Importance of Ventilation Features for Condensation Control
Selecting the right shelter is a negotiation with the dark. When choosing camping tents with stove jack, you are buying a small climate that must hold its own against the Karoo night. A stove too small leaves you awake, watching your breath plume in the lantern light. A stove too large turns your haven into a furnace, and no amount of canvas can save you then.
Ventilation is the quiet machinery behind condensation control. Without it, moisture gathers like a spectre in the corners, dripping onto your sleeping bag. Camping tents with stove jack designs vary in how they solve this. Some place the stove jack low. Others add a peak vent near the ridge. A few get it right:
– Stove jack offset from the vent opening
– Rainfly propped for crossflow
– Ground vent cut near the sleeping area
The right tent breathes. The wrong one weeps.
Examining the Stove Jack Placement and Flashing Design
The stove jack placement is the difference between a warm shelter and a chimney that smokes you out. Most camping tents with stove jack position the jack high on the wall, which works until wind decides otherwise. Flashing design matters more than most buyers realise.
A well designed flashing uses a gasket that resists both heat and rain. The angle of the pipe matters. If the stove pipe exits straight up, rain finds its way in. If it angles too much, creosote collects.
Consider the following when examining placement:
– Jack position relative to the tent peak
– Flashing material rated for sustained heat
– The gap between pipe and canvas
The wrong combination turns a Karoo evening into a coughing fit. Camping tents with stove jack that get the placement right keep the smoke out and the warmth in.
Pole Structures: Assessing Stability and Wind Resistance
The Karoo wind does not negotiate. It slams into a shelter with the force of a living thing, and the structure must hold or the story ends badly. When selecting among camping tents with stove jack, the pole architecture is the first line of defence. A flimsy frame means the stove pipe shifts, the canvas flaps, and the heat escapes through gaps that should not exist.
Pole diameter matters more than brand names. Look for thicker aluminium or fibreglass poles that resist bending under sustained gusts. The geometry of the frame also plays a role. A geodesic or dome shape sheds wind better than a straight walled cabin. Straight walls catch the breeze like a sail. Curved surfaces let it slide past.
– Inspect pole sleeves for reinforced stitching
– Check whether the hubs are cast metal or cheap plastic
– Confirm guy line attachment points align with the main stress zones
A tent that dances in the breeze will fatigue its fabric and loosen its seams. The stove jack remains useless if the entire structure threatens to collapse. Stability keeps the pipe sealed, the fire burning, and the smoke moving upward. In a proper storm, the difference between a solid frame and a wobbly one is the difference between a good night’s sleep and a cold, wet scramble.
The heaviest canvas will not save a weak frame. Conversely, a strong pole set with lighter fabric can ride out weather that would shred lesser shelters. The weight trade off is real, but so is the peace of mind. Camping tents with stove jack with robust pole systems hold their shape, and a held shape means the stove connection stays true. Wind resistance is not a luxury. It is the quiet contract between you and the elements.
Weight, Packability, and Overall Build Quality Analysis
Your back will negotiate the weight before the wind ever does. Camping tents with stove jack features range from compact solo shelters to canvas fortresses that require a bakkie and a tolerant friend. The packed weight changes where you can camp and how far you carry.
Manufacturers sometimes list weight without stakes, poles, or the jack assembly. That creative accounting leads to surprises at the trailhead.
- Confirm the packed length fits your load space
- Test the assembled weight against the listed figure
- Inspect stitch density on stress points
Build quality shows in details. Reinforced corners, welded loops, and stress-spreading patches extend the shelter’s life. A light frame with thin webbing saves grams, but costs you on day three. Camping tents with stove jack construction that feels solid in hand will hold up in the veld. Choose camping tents with stove jack models that balance portability with durability, because the total weight is the sum of every weak point you skipped.
Setup, Installation, and Safe Operation Practices
Choosing an Optimal Campsite for a Heated Shelter
Bushveld winds rarely blow from the same direction for long. That reality shapes how I position a stove tent before the first stake goes in. The ground must be level, but more importantly, the tent’s stove jack has to sit in a spot where smoke will not roll back into the sleeping area. I check the sky for dead branches, then check the soil for dampness.
The stovepipe needs a clear path downwind. Angle the tent so the prevailing breeze sweeps across the pipe, not into it. This simple move keeps the fire drawing properly and prevents carbon monoxide from pooling inside.
- Measure a two metre safety perimeter around the tent’s stove side
- Look for natural windbreaks like rocks or thick bushes, but keep them clear of the pipe exit
Camping tents with stove jack demand this care. A few minutes of placement saves hours of coughing and worry.
Step-by-Step Stove Jack and Pipe Flashing Installation
One loose seam around the stove jack turns a warm shelter into a hazard. I lay the tent flat and locate the reinforced jack panel. Fit the flashing through the opening from the outside, then roll the fabric collar over the flange. Secure the collar with the shock cord.
- Insert the stovepipe through the flashing from inside.
- Adjust the pipe to extend 300 mm above the flashing.
- Lock the pipe sections and check clearance around the hot pipe.
- Test the draft with a piece of burning paper.
Camping tents with stove jack demand this precision. A misaligned flashing lets smoke spill into the living space and creates a path for embers to reach the canvas. Run the stove with the air intake open. Watch the pipe for sagging as it heats. For camping tents with stove jack, repeat the collar check after the first burn. Fabric relaxes after the first heat cycle.
Fireproofing Essentials: Floor Mats and Heat Shields
Fire needs a barrier between itself and the ground. A stove sitting directly on a tent floor invites disaster. Even with a stove jack, radiant heat travels downward and outward. Floor mats and heat shields matter as much as the flashing.
Place a fireproof mat under the stove footprint. Extend it at least 300 mm beyond each side. Embers fall, logs roll, ash spills. For camping tents with stove jack, use a silicone coated fiberglass mat or welded rubber. Avoid materials that char or melt.
Heat shields reflect radiant heat away from the tent walls. Position them between the stove and any fabric. Air gaps improve effectiveness.
- Check the mat for burn holes after each trip.
- Confirm the shield covers the full stove side.
Camping tents with stove jack require this discipline every time. Heat behaves predictably. Protect the floor and walls and the tent stays intact.
Guidelines for Achieving Proper Airflow and Draft
On the cold Highveld, a camping tent with stove jack without a proper draft is just a canvas chimney. I learned this the hard way near Clarens. The trick is to create a pressure difference. Open the bottom vent wide, light a scrap of paper in the stove, then close the door. The heated air races up the pipe, pulling fresh air behind it.
- Check the pipe joints are clean, no soot or grit breaking the seal.
- Use a single vertical run. Elbows kill draft.
- Keep the jack flange snug, but not clamped so tight it deforms the fabric.
Once the fire catches, adjust the damper in small increments. A camping tent with stove jack needs a clear path from floor vent to rain cap. Watch the flames. A lazy, orange flame means low oxygen. A blue, roaring flame means too much draft. Close the damper slightly. Always keep a window or side vent cracked open. This is not optional. Stale air starves the fire and turns the glass black. Practice this once at home. It will save your night in the wild.
Critical Safety Measures for Combustion Within a Tent
Preventing Carbon Monoxide Poisoning with Proven Tactics
Carbon monoxide is the silent threat inside any heated shelter. For camping tents with stove jack, combustion safety demands more than a working chimney. I always carry a battery operated CO alarm, placed at sleeping height, because this gas sinks or mixes unpredictably. That single device has saved me more times than I care to count!
Proven tactics go beyond alarms. Every stove pipe joint must be checked before lighting. A simple soapy water test reveals leaks by bubbling. Also, never let the fire smolder overnight. Low oxygen conditions increase CO production, which is why I bank the coals out completely. These actions break the chain of poisoning.
- Install a CO detector with a digital readout
- Keep at least one vent window slightly open at all times
- Inspect door seals and pipe grommets regularly
Remember, your nose cannot detect this odorless killer. Trust instruments and discipline, not luck.
Managing Fire-Retardant Coatings and Their Longevity
Fire retardancy degrades after about three seasons, a fact too many campers discover when a stray spark finds a weakness. I once watched a supposedly treated canvas burn quickly. The critical safety measure for combustion within a tent is inspecting the coating’s integrity, not assuming the label lasts forever.
Heat from the stove pipe accelerates breakdown of the retardant chemistry around the jack. For camping tents with stove jack, flex the fabric near the flashing. If powder appears or the coating cracks, the protection is gone. UV exposure and damp storage cause equal damage.
Routine Inspections for Spark Damage and Fabric Deterioration
Routine inspection sounds dull. Until a stray ember finds a weak seam and you are watching months of memories turn to ash. I check my shelter before every trip. The fabric around the pipe takes the harshest beating of any surface, so I treat that section with extra suspicion.
Spark damage hides in plain sight. Discoloration on the canvas. Stiff patches where heat bit deep. Pinprick holes that glow red from the firelight. For camping tents with stove jack, the seam where the flashing meets the fabric is the first place trouble appears. I run a gloved hand over every edge, each time looking for char, tar, or a thread that snaps too easily. The heat cycles dry out the rubber flashing. Cracks spider outward from the grommets.
When I inspect, I check for these issues:
– Tiny scorch points on the inner wall near the pipe.
– Stitching around the jack that feels loose or burnt.
– Zipper tracks near the stovepipe for melted teeth.
– Any pinhole that lets daylight through the canvas.
This routine takes five minutes. Camping tents with stove jack models need that attention. Burning down your shelter takes no time at all.
Best Practices for Safe Overnight Burning
An ember can cross a stove jack in under a second, turning a peaceful camp into a frantic stampede. Overnight burning changes everything! The fire becomes a roommate you cannot watch forever. For camping tents with stove jack, I hold one hard rule: never let the flames grow past a low, controlled glow before you sleep. I choke the air intake, listen for the soft hiss of a steady burn, and place a monoxide alarm near my head. Then I run a quick sequence:
- Inspect the flashing seam for any gap.
- Remove all flammable items within one meter.
- Verify the spark arrestor is clean.
That ritual lets me sleep. The fire stays predictable, the shelter stays intact, and the cold stays outside.
Emergency Preparedness and Evacuation Protocols
When the fire breathes inside a shelter, the margin between comfort and catastrophe narrows to a few deliberate actions. A canvas wall can smolder for minutes before revealing its secret, thin ribbons of smoke weaving through the fibers. For aficionados of camping tents with stove jack, emergency preparedness begins with a practiced mind and a clear route to the outside world.
Evacuation protocols should be rehearsed before the first flame. I keep a flashlight and a knife within arm’s reach, always. The unzipping of the door must not snag on a boot or a bag. If the fabric begins to singe, you do not wait, you move!
- Know where every seam and stay intersects.
- Keep the stove pipe cool to the touch near the jack.
- Have a fire extinguisher within two steps of the entrance.
That is the grim arithmetic of camping tents with stove jack, a shelter that demands respect.
Maintenance, Seasonal Care, and Upgrade Strategies
Post-Trip Cleaning and Preventive Treatment Methods
Many owners neglect their camping tents with stove jack until a stain becomes a tear. After each trip, brush out ash and soot using a stiff bristle brush, then wipe the interior seams with a damp cloth. Avoid harsh detergents; they strip the fire retardant coating. Post-trip cleaning is the first defense against long term fabric degradation.
For seasonal care, always dry the shelter completely before folding, otherwise mildew sets into the canvas. Store it loosely in a breathable sack, not compressed. Reapply seam sealer to the jack flashing every autumn before the cold weather arrives.
- Lubricate the zippers with graphite powder
- Check the guy line webbing for frayed edges
- Inspect the stove jack gasket for hardening
Upgrade strategies for camping tents with stove jack often cost less than replacement. Swap out stock guy lines for reflective paracord, or add a silicone gasket around the pipe penetration to improve draft without altering the original flashing design.
Effective Storage Solutions to Prevent Mildew and Corrosion
South African weather tests every seam of your shelter. Coastal humidity eats at zippers and metal grommets, while the Highveld sun degrades unprotected fabric. Maintenance means more than wiping soot. Check stitching around the stove jack collar each trip, and treat pipe ring rust with sandpaper and a corrosion inhibitor.
Seasonal care follows our rainfall patterns. After the wet winter months, inspect the flashing for water stains that signal a failing seal. In summer, store the tent away from direct sunlight in a cool, dry spot. Effective storage solutions for camping tents with stove jack to prevent mildew and corrosion include:
- Placing a silica gel pack in the storage sack
- Keeping the tent off concrete floors on a pallet
- Loosening shock cords to ease pole tension
Upgrade strategies for camping tents with stove jack often target the ground base. Replace stock stakes with longer pegs for gusty Cape winds, and add a heat-resistant patch around the jack area.
Refreshing Seams, Zippers, and Stove Jack Gaskets
Maintenance for camping tents with stove jack demands attention to the trifecta of seams, zippers, and gaskets. Reapply seam sealer before the fabric shows wear, because a failing stitch line invites moisture into the inner layer. Zippers deserve a dry silicone spray, while the gasket around the stove jack needs a flex test. A simple checklist helps:
- Wipe the zipper track with a lint-free cloth
- Apply seam sealer with a fine brush
- Press the gasket to confirm elasticity
Seasonal care follows the South African calendar. After winter, inspect the gasket for cracks caused by cold cycling. In summer, use a soft brush to clear dust from zipper teeth, then treat the rubber with a UV protectant.
Upgrade strategies include replacing factory zippers with coil versions that resist salt air. For the stove jack, fit a secondary gasket to create a buffer against heat damage. These refinements extend the life of camping tents with stove jack.


0 Comments